

A new gutter system does more than improve the look of a roofline. It directs rainwater away from the foundation, siding, landscaping, walkways, and entry areas that can suffer when drainage fails. Knowing how to prepare for gutter installation helps the crew work efficiently, gives them clear access to the roofline, and helps you get the best long-term performance from the finished system.
Preparation does not mean taking on a complicated construction project before your installer arrives. Most of the work belongs to the gutter professional. Your role is to make the property accessible, identify concerns early, and plan for a clean, safe installation day.
Start With a Clear Assessment of Your Drainage Needs
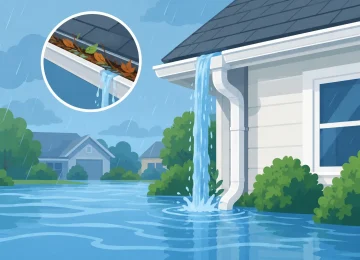
Before installation day, take time to consider what has not been working with the current gutter system. Water spilling over the edge during storms, leaking seams, sagging runs, standing water near the foundation, and downspouts that discharge too close to the house are all useful details to share.
Walk around the property after a rainfall if possible. Note where water collects, whether mulch or soil washes away, and which areas of siding show splash marks or staining. On commercial properties, pay attention to pedestrian routes, loading areas, entrances, and paved surfaces where runoff can become a safety concern.
A professional installer will evaluate roof pitch, drainage patterns, fascia condition, gutter size, downspout placement, and the amount of water the roof collects. Still, your observations help create a system tailored to the property rather than a one-size-fits-all replacement. A larger gutter size or additional downspout may be warranted on a broad roof area, but the right approach depends on the building’s layout and local drainage conditions.
Confirm the Scope Before Gutter Installation
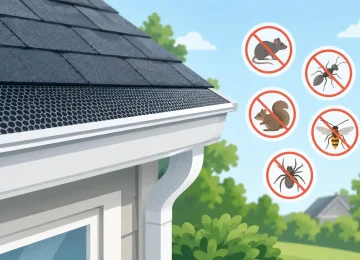
A detailed estimate should make it clear what will be installed and what work is included. Ask about the gutter material, profile, color, downspout size, number of downspouts, hanger type, and whether old gutters will be removed and hauled away. If gutter guards are part of the project, confirm the guard style and whether the existing system needs cleaning before installation.
It is also wise to ask how the installer will handle minor fascia concerns discovered during removal. Gutters need solid attachment points. If fascia boards are rotted, loose, or damaged, attaching a new system without addressing that issue can compromise the installation. Some repairs can be handled as part of the project, while more extensive wood or roof work may require a separate plan.
For property managers and commercial owners, confirm access requirements with tenants, building staff, or maintenance teams before the scheduled date. A few minutes of coordination can prevent delays around gates, parking areas, loading zones, or secured roof access.
Clear the Work Area Around the Building
Gutter installation requires ladders, materials, tools, and room for technicians to move safely along the building perimeter. Clear vehicles from the driveway, garage approach, or parking spaces closest to the work area. This protects vehicles from dust or falling debris and gives the crew space to stage equipment.
Move patio furniture, grills, potted plants, children’s toys, decorative items, and other movable belongings away from exterior walls. If you have fragile landscaping directly below the roofline, point it out before work begins. Installers can take reasonable precautions, but advance notice helps them choose the safest ladder placement and material-handling route.
Keep gates unlocked and make sure any pets are safely indoors or away from the work zone. Technicians may need access to both sides and the rear of the property to complete the system properly. If there are security codes, locked storage areas, or special instructions for accessing a commercial site, provide those details before the crew arrives.
Protect What Cannot Be Moved
Not every feature near the roofline can be relocated. Air-conditioning units, fixed awnings, garden beds, exterior lighting, and masonry features may affect how ladders are positioned or where downspouts can run. Identify these items during the estimate process rather than waiting until installation begins.
Covering particularly delicate plants can be helpful, but avoid placing tarps where they could create a slipping hazard or block access. A better option is often to trim back low branches or overgrown shrubs that press against the house. Branches rubbing the roofline can interfere with installation and continue to drop debris into the new gutters afterward.
If a downspout needs to discharge toward a landscaped area, discuss options for directing water farther from the foundation without damaging the appearance of the yard. Extensions, underground drainage connections, and splash-block placement each have advantages, but the best choice depends on grade, soil conditions, and how the property is used.
Check for Roofline Issues Before the Crew Arrives
New gutters cannot solve every water problem on their own. If shingles are missing, flashing is damaged, or water is entering behind the gutter, those roof-related issues should be identified early. Likewise, peeling fascia paint, soft wood, or visible rot may indicate moisture damage that needs attention before or during the installation.
You do not need to climb a ladder to inspect these areas. Look from the ground, use photos from a prior roof inspection, or let the gutter contractor assess the condition during the estimate. Safety comes first. Trying to inspect high roof edges without the right equipment can cause an avoidable injury.
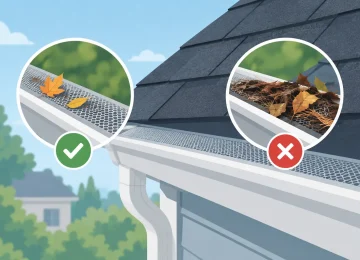
Also consider nearby trees. Mature trees provide valuable shade, but they can increase the amount of leaves, needles, seed pods, and twigs reaching the gutter system. Gutter guards can reduce debris buildup and make maintenance easier, though no guard eliminates the need for occasional inspection. If branches hang directly over the roof, trimming them back may protect both the roof and the new gutters.
Plan for Installation Day
Most residential gutter replacements can be completed efficiently when the work area is ready. The crew may create normal job-site noise from ladders, cutting equipment, and material handling, so plan accordingly if you work from home, have young children, or need a quiet environment for appointments.
Make sure an authorized decision-maker can be reached by phone. Questions sometimes arise about an unexpected fascia condition, a preferred downspout route, or a feature that was not visible during the original assessment. Quick communication helps the crew keep the project moving while ensuring decisions reflect your priorities.
Weather can affect scheduling. Rain, high winds, lightning, and icy conditions make ladder work unsafe, and a reputable contractor will reschedule when conditions require it. That can be inconvenient, but it is the responsible choice for workers and your property. Keep some flexibility in the schedule, especially during seasons with frequent storms.
Know What to Review After Installation
Once the work is complete, walk the property with the installer if possible. Look at the gutter alignment, downspout locations, and discharge points. The system should appear securely attached and properly pitched to carry water toward the downspouts. Ask how to care for the system and what signs may indicate that service is needed later.
Keep the area around downspout outlets clear. Leaves, mulch, snow, and stored items can block water from moving away from the building. After the first significant rainfall, take a quick look around the foundation and drainage areas. You are checking for proper flow, not trying to diagnose the system yourself. If something does not look right, report it promptly.
For homes and businesses in New Jersey and Staten Island, Cavallari Gutters can help evaluate the roofline, drainage needs, and practical details that affect a successful installation. A clear estimate and a prepared property give everyone a stronger starting point.
A well-prepared installation day is really about protecting the investment you are making. Give the crew safe access, raise drainage concerns before work begins, and leave room for professional recommendations based on what the property needs. The result is a gutter system positioned to do its job when the next hard rain arrives.
Leave a Reply