
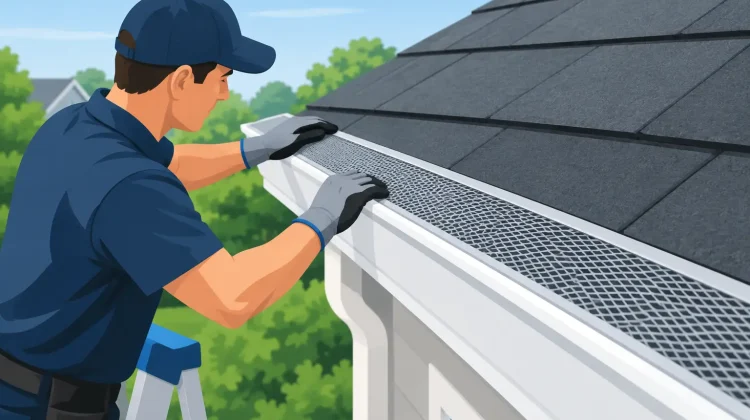
A gutter guard installation example is most useful when it shows more than a screen placed over a gutter. A proper job accounts for the roof edge, the condition and pitch of the existing gutters, the type of debris around the property, and where water needs to go during a hard rain. For homeowners and property managers in New Jersey and Staten Island, those details can make the difference between reduced maintenance and another source of overflow.
What a Proper Gutter Guard Installation Should Accomplish
Gutter guards are designed to keep leaves, twigs, roof grit, and other debris from collecting inside the gutter channel while allowing rainwater to enter and move toward the downspouts. They can significantly reduce the frequency of gutter cleaning, but they are not a substitute for a sound drainage system.
Before guards are installed, the gutters should be secure, correctly pitched, and free of old debris. Downspouts need to be open and positioned to direct water away from the foundation. If a gutter is pulling away from the fascia, holding standing water, or overflowing because it is undersized, covering it with guards will not solve the underlying problem.
The right system should also fit the property. A home beneath mature oak or maple trees may need a guard that handles small leaves and seed pods. A commercial building with a broad roof area may require larger gutters, additional downspouts, or a more carefully planned guard layout to manage heavy rainfall. The goal is not simply to install a product. It is to keep the full system draining as intended.
A Gutter Guard Installation Example From Start to Finish
Consider a two-story home with standard aluminum gutters, several large trees near the roofline, and recurring overflow near the front entry. The homeowner has cleaned the gutters twice a year, yet water still spills over during heavy storms. The problem is not just the leaves. Debris has built up near one downspout outlet, and a section of gutter has settled enough to affect its pitch.
1. Inspecting the existing drainage system
The work begins at ground level and along the roofline. A gutter professional checks for loose hangers, separated seams, bent sections, damaged fascia, and signs that water has been spilling behind the gutter. Staining on siding, washed-out mulch, foundation dampness, and peeling paint can all point to drainage issues.
On this example home, the gutters are still in serviceable condition, but the front run needs to be resecured and adjusted. The downspout is flushed to confirm that it is open. This step matters because a guard can keep new debris out, but it cannot clear an existing clog underground or inside the downspout.
2. Cleaning and preparing the gutter channel
Next, the crew removes leaves, shingle granules, dirt, and compacted material from every section. The gutter interior is rinsed and checked again for proper flow. Any minor seam leaks or loose fasteners should be addressed before the guards are added.
This preparation is where shortcuts often show up. Installing guards over dirty gutters traps the problem below the surface. The system may look finished from the yard, but water can still back up once debris blocks the outlet. A clean channel gives the guards a proper starting point and makes it easier to identify repairs that should not be ignored.
3. Selecting a guard that fits the roof and debris conditions
Not all gutter guards perform the same way on every property. Mesh-style guards can be effective for small debris, while other designs rely on a shaped surface that helps guide water into the gutter and directs leaves away. The best choice depends on the roof pitch, gutter size, surrounding trees, and amount of water the roof sheds.
For this home, a durable guard system is selected to cover the gutter opening without restricting water flow. The material is chosen to resist rust and remain stable through changing temperatures. The guard needs to sit securely along the roof edge and gutter lip without creating gaps where debris can enter or sections can lift in wind.
4. Installing guards with a secure, consistent fit
Each guard section is measured and fitted to follow the gutter run cleanly. Where rooflines change direction, the installer trims and secures the material carefully so that corners and end caps do not become collection points for leaves. Guards should lie flat and remain firmly attached without damaging the roof or interfering with shingles.
On the front run of this example, the installer also corrects the gutter pitch before fastening the guard sections. Water is then tested at several points along the roof edge. It should enter the gutter, move steadily toward the downspout, and exit without pooling or spilling over the front lip.
A quality installation does not depend on appearance alone. From the ground, a finished gutter guard system should look neat and aligned. During a controlled water test, it should prove that the drainage path is working.
5. Cleaning up and explaining future care
Once the guards are in place, the work area should be left clean. Removed debris, old damaged components, and material cutoffs should not be left around landscaping, walkways, or parking areas. On a residential property, care around flower beds and siding matters just as much as the finished gutter line.
The homeowner should also receive clear guidance about maintenance. Even a well-installed guard system may need periodic visual checks, especially after a major storm or during heavy leaf fall. Debris can collect on top of guards, around valleys, or near roof transitions. Occasional service helps ensure the system continues to perform and gives a professional the chance to spot changes before they become costly repairs.
What This Example Shows About the Value of Guards
The most visible benefit is less gutter cleaning. When fewer leaves and twigs enter the channel, there is less opportunity for clogs to form near downspouts. That can reduce the risk of water spilling over gutters and soaking areas around the foundation.
There are practical limits, though. Gutter guards will not repair rotted fascia, correct a poorly designed drainage layout, or prevent every bit of fine debris from reaching the system. They also cannot compensate for gutters that are too small for a large or steep roof. A dependable recommendation starts with an honest assessment of the existing system, not a one-size-fits-all sales pitch.
For commercial properties, the same principle applies at a larger scale. A guard installation may help reduce maintenance demands over entrances, storefronts, loading areas, and shared walkways. However, properties with flat or low-slope roofs, internal drainage, or extensive tree coverage may need a different maintenance plan than a typical single-family home.
Signs Your Property May Be a Good Candidate
Guards are worth considering when gutters repeatedly fill with leaves, pine needles, seed pods, or roof granules; when cleaning requires unsafe ladder work; or when regular debris buildup contributes to overflow. They are especially useful when the gutter system itself is in good condition but needs protection from nearby trees.
If water is already running behind the gutters, pooling beside the building, or pouring over the edge in ordinary rain, start with an inspection. The best next step may be a repair, a replacement section, additional downspout capacity, or a complete gutter upgrade before guards are installed.
Cavallari Gutters approaches guard work as part of the larger drainage system, with attention to fit, water flow, and a clean finished job. A professional estimate can clarify what your property needs and whether gutter guards will provide lasting value.
When rainwater is being directed away from your roofline, siding, foundation, and landscaping the way it should be, gutter guards become more than a convenience. They become one practical part of protecting the property you are responsible for maintaining.


Leave a Reply